一、网络拓扑图
|
设备型号 |
内网 |
外网 |
|
NETSCREEN 204 |
LANIP:192.168.1.0/24 |
WANIP:10.10.10.2/24 |
|
NETGEAR FVS318 |
LANIP:192.168.0.0/24 |
WANIP:10.10.10.3/24 |
|
PC机 |
Pc1:192.168.1.2/24 |
Pc2:192.168.0.2/24 |
整个过程我们分为六步说明,第一到第五步骤为NETSCREEN设备的配置,第六步骤为NETGEAR FVS318v3的配置
二、NETSCREEN防火墙配置
第一步、NETSCREEN 接口配置
在204的NETWORK—INTERFACES里配置E1口为TRUST(内网接口) IP地址为:192.168.1.1/24;E3口为untrust(外网接口)IP地址为:
10.10.10.2/24
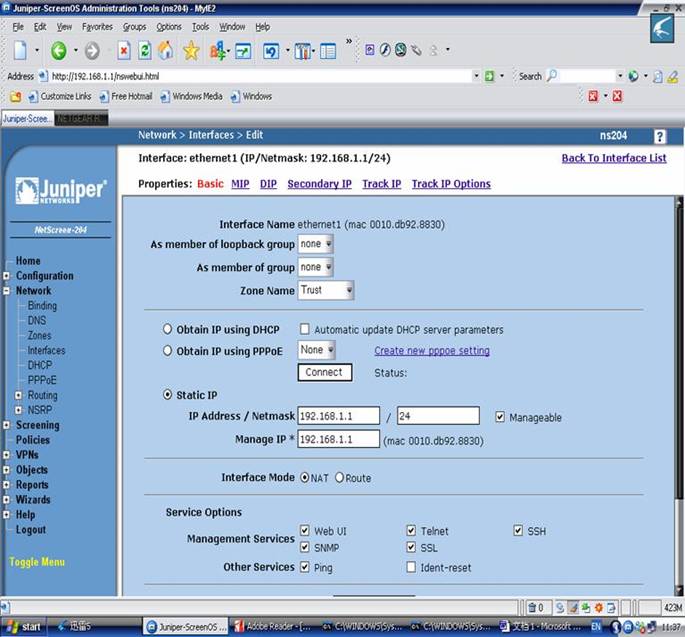
E1的zone name设为 trust,static ip设IP地址和子网掩码,Interface mode 为NAT
如图所示:
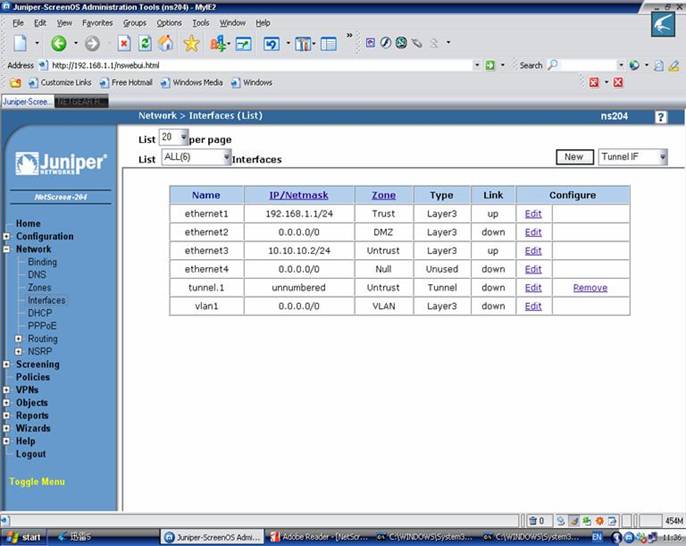
E3 的zone name设为 untrust,static ip设IP地址和子网掩码,Interface mode 为route模式

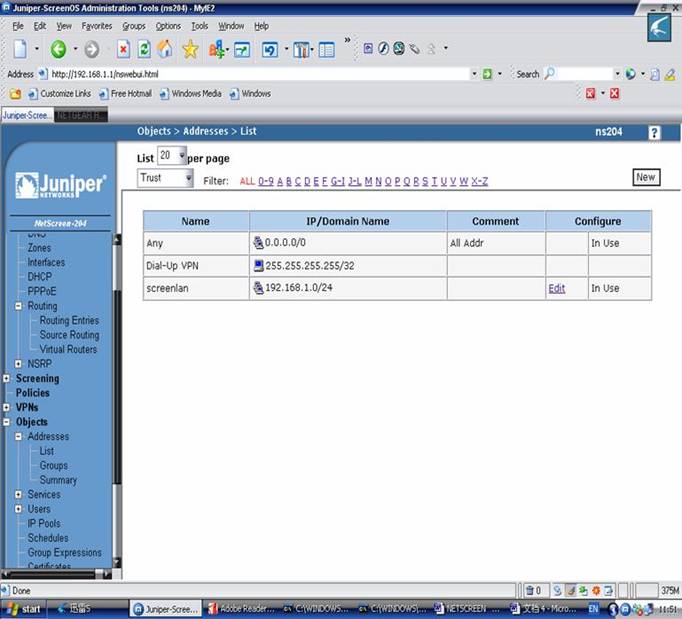
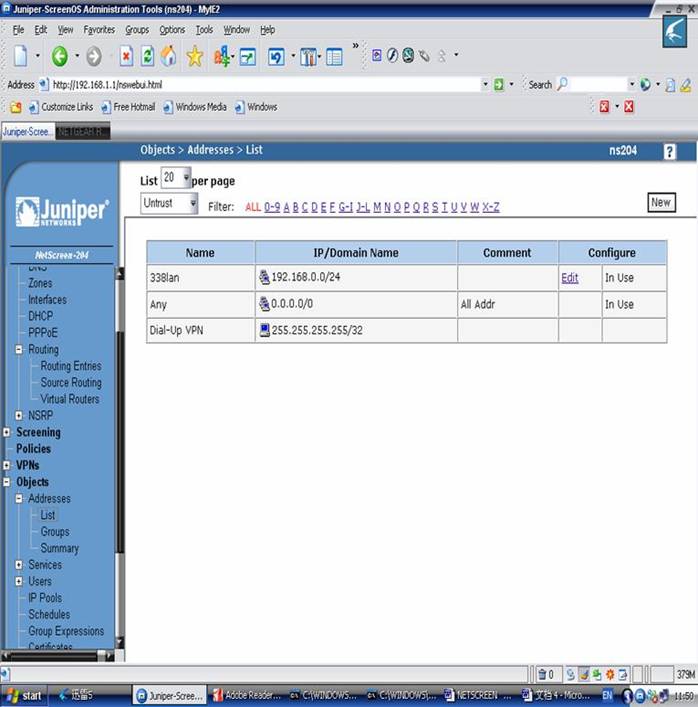
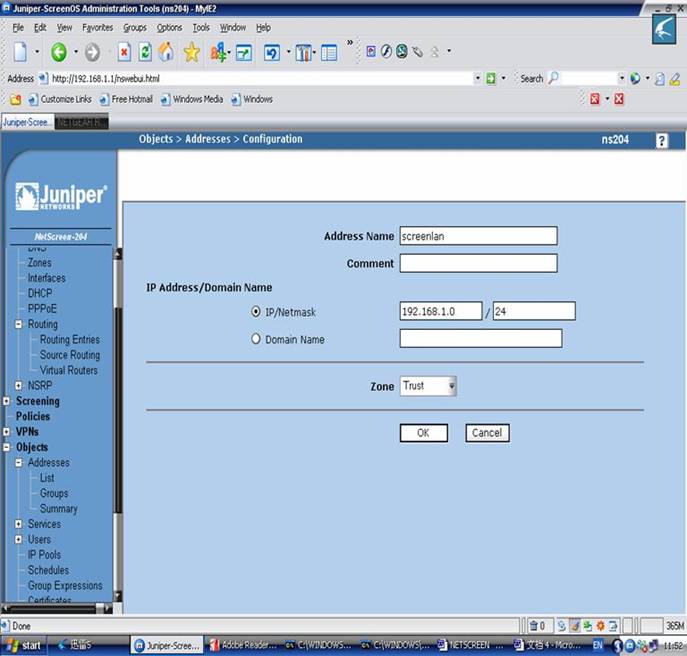
第二步:NETSCREEN objects配置
Objects>addresses>list>new:输入以下内容
- Address name: screen lan
- Ip address/domain name:
- IP/NETMASK: 192.168.1.0/24 (为NETSCREEN204内网网段)
- Zone:trust
Objects>addresses>list>new:输入以下内容
- Address name: 338 lan
- Ip address/domain name:
- IP/NETMASK: 192.168.0.0/24 (为FVS318内网网段)
- Zone:untrust
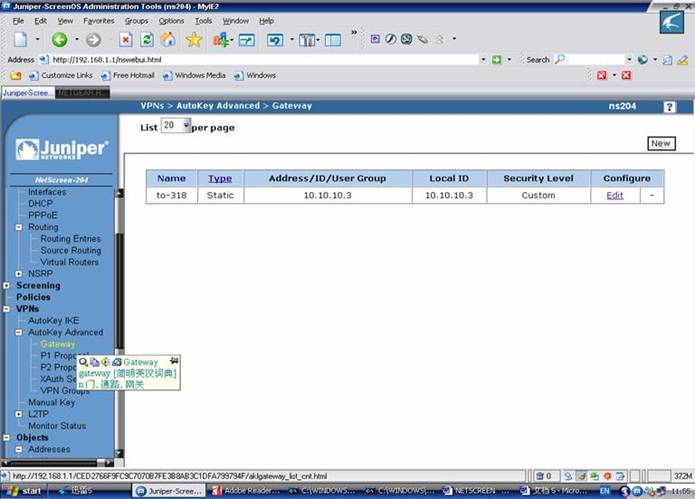
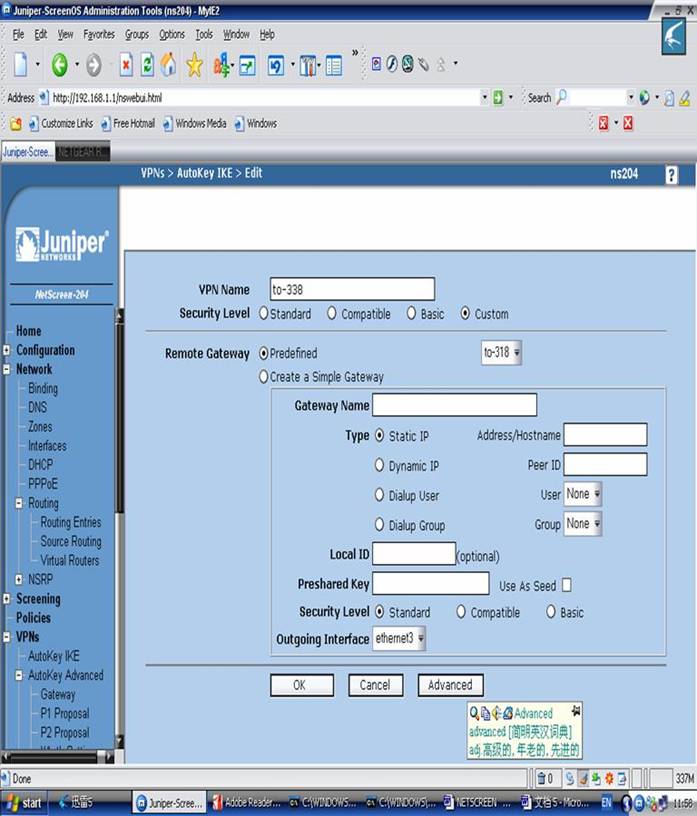
第三步:NETSCREEN VPN配置
Vpns>autokey advanced>gateway>new
Gateway name: to-318( 任意)
Security level: custom
Remote gate way type:
- Static ip address(选择),ip address/hostname:10.10.10.3
- Preshared key:12345678 (和NETGEARFVS318里的要一致)
- Locol id:10.10.10.3(对端318的标识)
- Outgoing interface:ethernet3
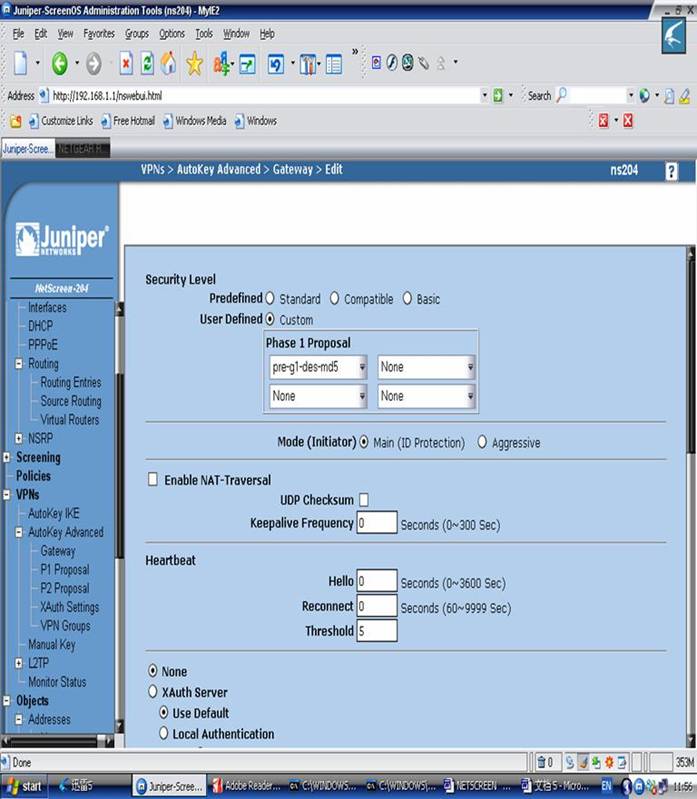
>advanced:
- security level:custom
- phase1proposal(for custom security level):pre-g1-des-md5
- (加密方式要和FVS318对应)
- mode(initiator): main(id protection)
(模式要和FVS318对应)
如图所示:

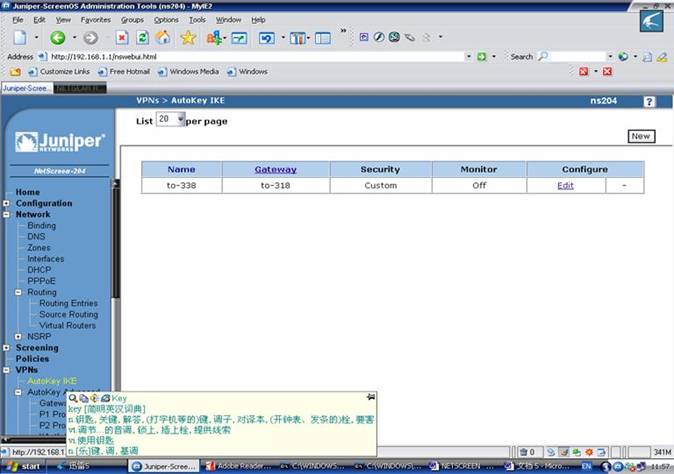
Vpns>autokey ike>new:
- Vpn name:to-318
- Security level:compatible
- Remote gateway:
- Predefined(选择),to-318
- Outgoing interface :ether3
>advance
- security level:custom
- phase 2 proposal:nopfs-esp-des-md5
- bind to:none
- proxy-id:
- local ip /netnask:192.168.1.0/24
- remote ip /netmask:192.168.0.0/24
- service:any
如下图所示:

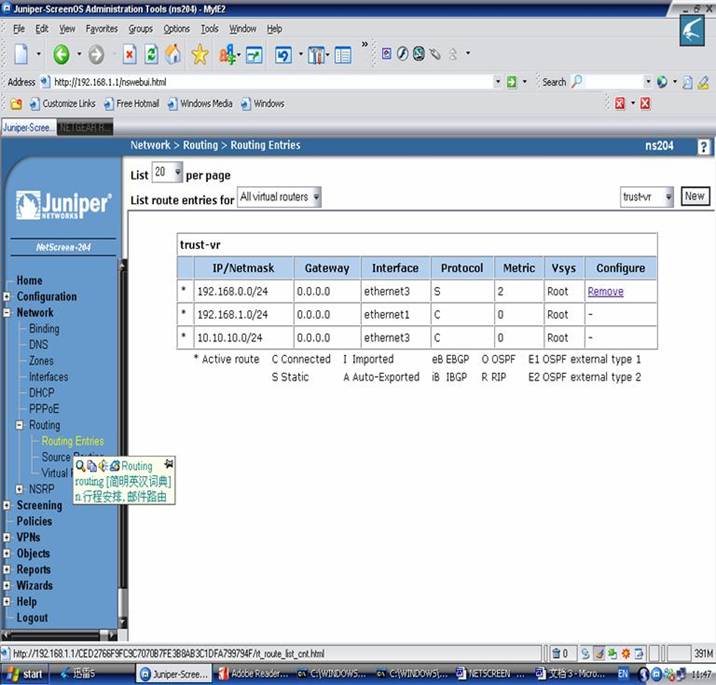
第四步:NETSCREEN 路由配置
Network>routing>routing entries>trust-vr new
- Network address/netmask:192.168.0.0/24
- Gateway:
- Interface:ethernet3
- Gateway ip address:0.0.0.0
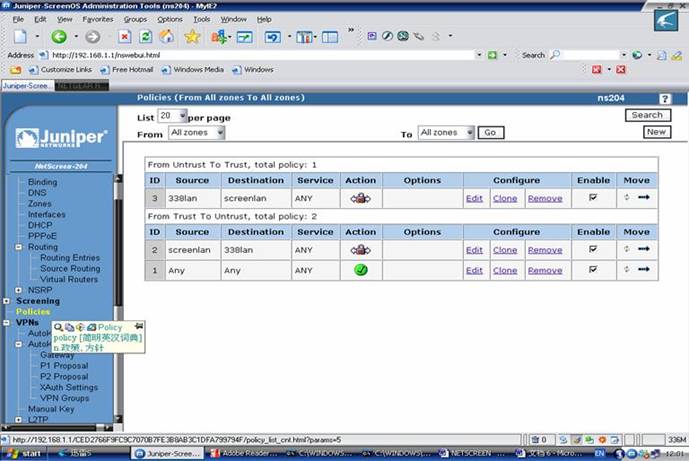
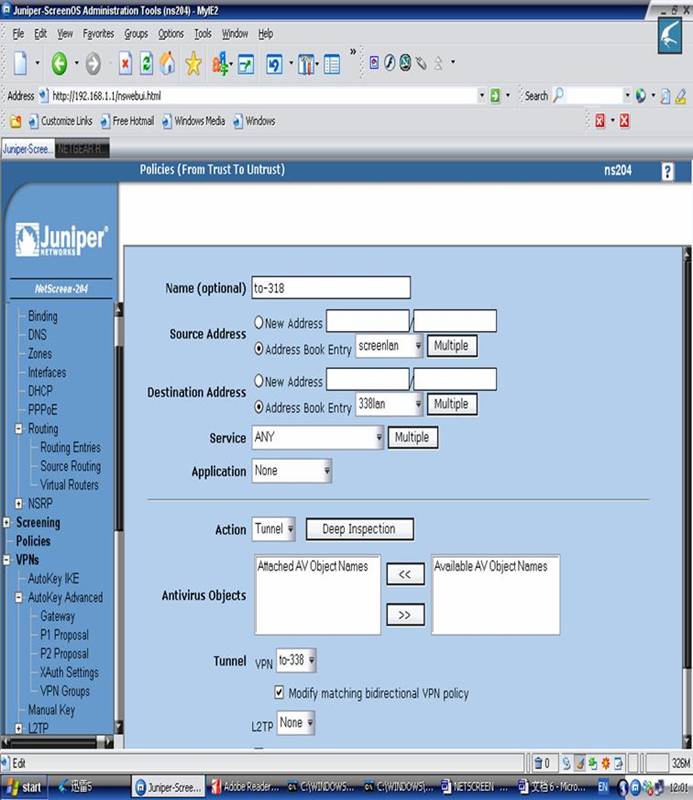
第五步:NETSCREEN VPN POLICY配置
Policies>(from:trust,to:untrust)new
- Name:to-318
- Source address:screenlan
- Destination address:318lan
- Service:any
- Action:tunnel
- Tunnel:vpnto-318
- (选中)modify
Policies>(from:trust,to:untrust)new
- Name:any
- Source address:any
- Destination address:any
- Service:any
- Action:permit
- Tunnel:ether3
如图所示:
三、在NETGEAR FVS318v3中的VPN IKE/VPN策略配置
进入“VPN”-“IKE Policeies”,点“ADD”按钮,添加一条IKE策略,这和netscreen中虚拟专用网阶段1相对应。
- Direction/Type:我们选择“Both Direction”
- Exchange Mode:选择“Main Mode”
- Encryption Algorithm:DES
- Authentication Algorithm:MD5
- Authentication Method:Pre-shared Key,并填入和密钥
- Diffie-Hellman (DH) Group:“Group 1(768 Bit)”
- SA Life Time:28800
以上配置要确保和netscreen中阶段一个配置相同。配置如下图
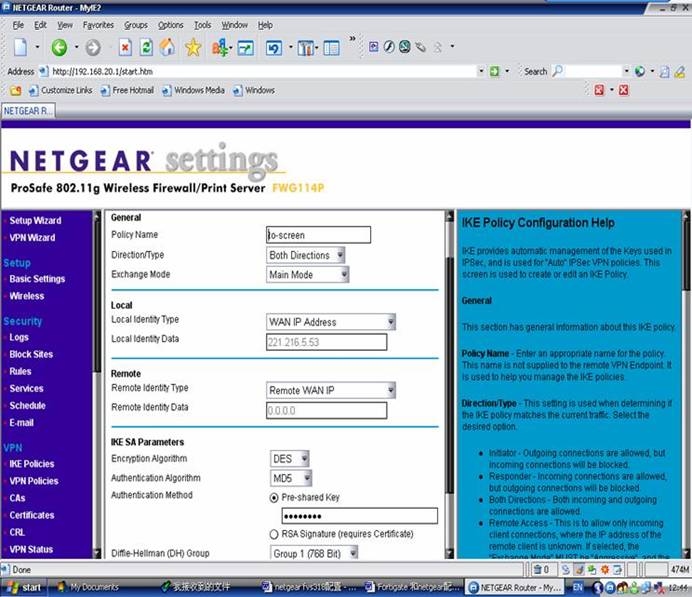
点“Apply”按钮完成IKE策略设置。
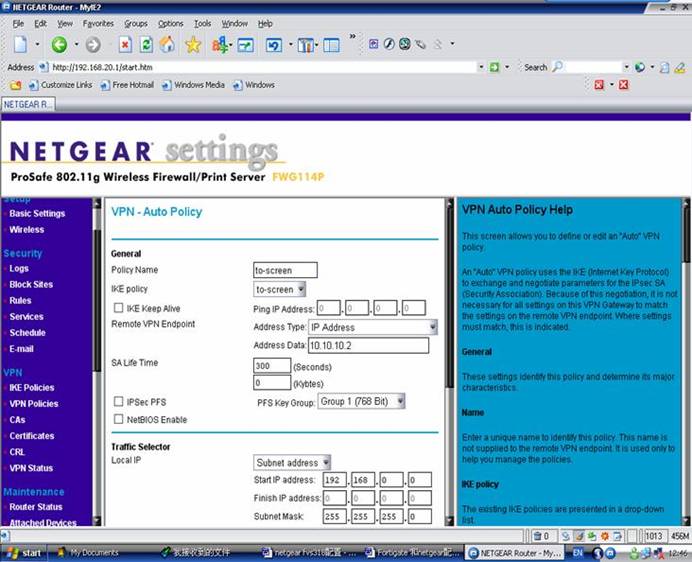
进入“VPN”-“VPN Policies”,点“ADD”按钮添加一条新的VPN策略,这里和netscreen的阶段2相对应。
- IKE policy:选择我们刚才建立的那条IKE策略。
- Remote VPNEndpoint Address Type:根据自己的实际情况选择,这里我们选择“IP Address”。
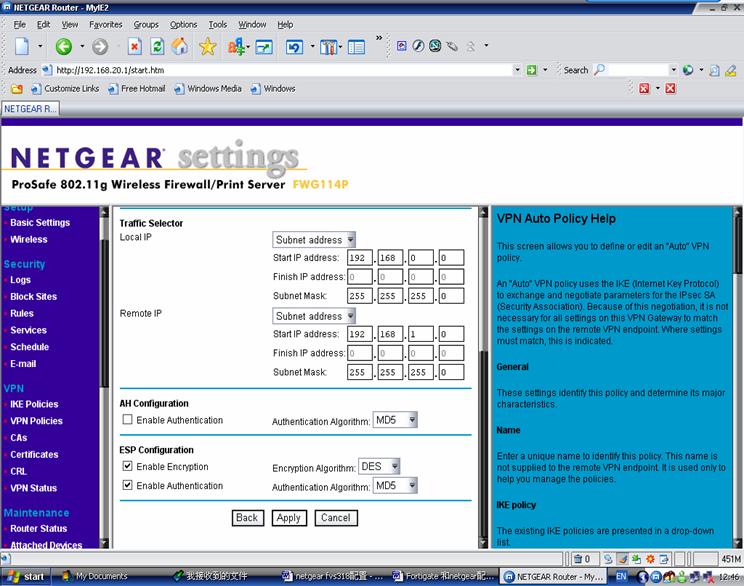
- Local IP:选择“Subnet Address”并添入本地内部子网的网络号和掩码
- Remote IP:选择“Subnet Address”并添入远程内部子网的网络号和掩码
- ESP Configuration:选择Enable Encryption、Enable Authentication
- Encryption Algorithm、Authentication Algorithm要和Fortigate内的设置一致,选择“DES”和“MD5”。
配置如下图所示:
完成以上设置后可到“VPN”-“VPN Status”中查看VPN连接状态。
|
序号 no. |
日期 date |
作者 author |
摘要 summary |
|
1 |
2010-10-21 |
Netgear |
文档创建 |
|
2 |
2010-10-26 |
NETGEAR |
定义V1.2,upgrade NETGEAR logo |