(本文适用于:Netgear GSM7324,GSM7312,GSM7212,GSM7224,FSM7326P,FSM7328S,FSM7352S)
从Console 登陆交换机,设置交换机IP地址
FSM73xx starting...started!
(FSM7326P)
User:admin
Password:
NOTE: Enter '?' for Command Help. Command help displays all options
that are valid for the 'normal' and 'no' command forms.For
the syntax of a particular command form, please consult the
documentation.
(FSM7326P) >enable
Password:
(FSM7326P) #network protocol none
/*取消DHCP获取IP地址功能*/
Changing protocol mode will reset ip configuration.
Are you sure you want to continue? (y/n)y
(FSM7326P) #network parms 192.168.0.13 255.255.255.0 192.168.0.1
/*手动设置IP地址子网掩码网关*/
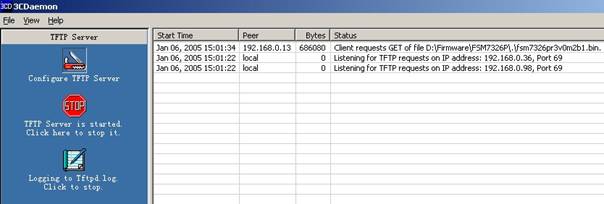
- 启动TFTP服务器,配置TFTP服务器的根目录为升级文件所在目录
如3Com TFTP Server

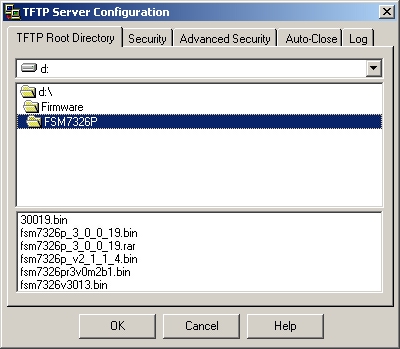
又如Solarwinds TFTP Server
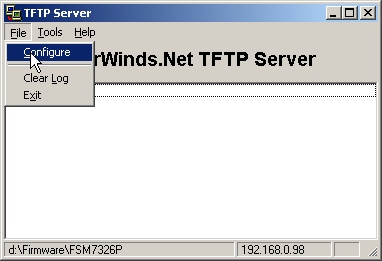
配置根目录:
配置发送接收模式

首先,登陆交换机WEB管理页面
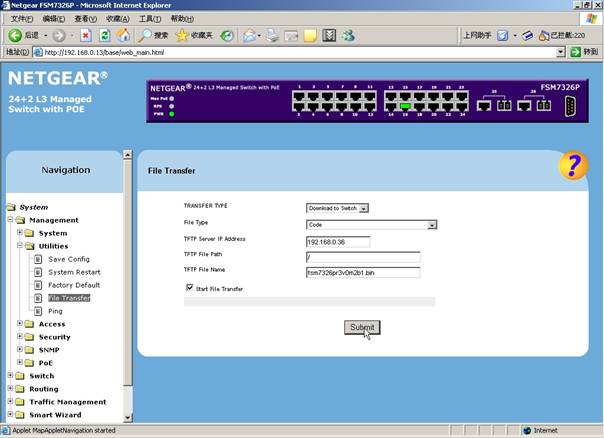
然后,展开左边菜单System>Management>Utilities>File Transfer页面
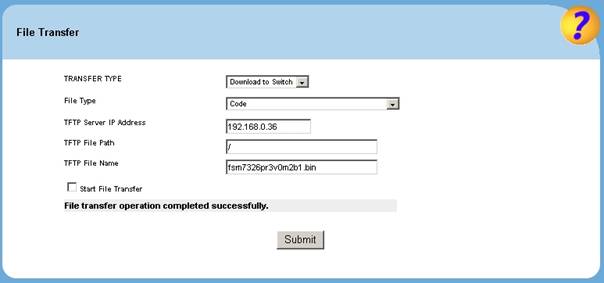
在Transfer Type选择Download to Switch
File Type 选择Code
TFTP Server IP Address 输入TFTP服务器IP地址
TFTP File Path里输入TFTP文件路径,如果在TFTP根目录,可以不填。
TFTP File Name输入完整的文件名,包括后缀。
最后把Start File Transfer 选上,点Submit开始升级。
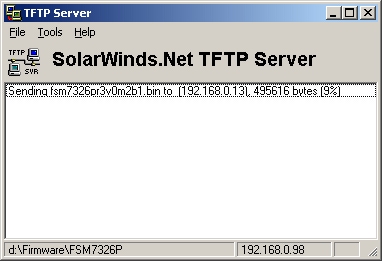
这时候可以在tftp服务器上看到进度
升级完成后,Web页面显示
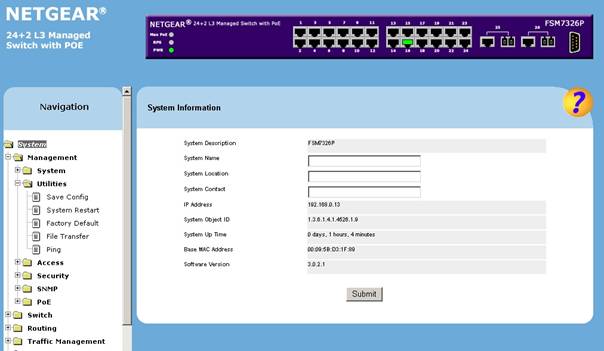
查看当前版本,点击菜单的System:
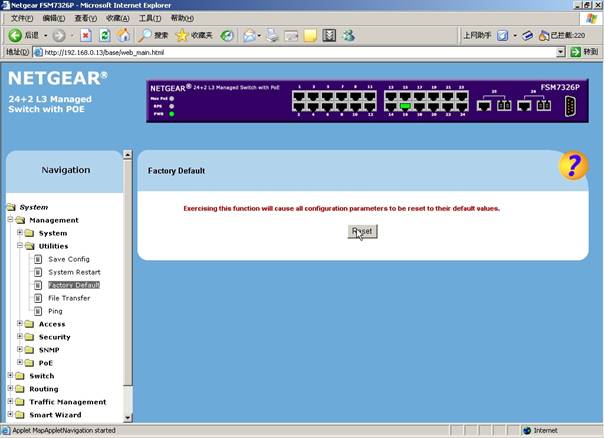
最后,清空原有配置,从System>Management>Utilities>Factory Default页面恢复
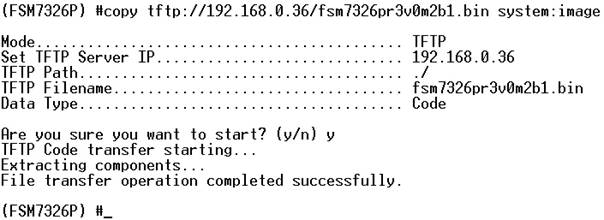
超级终端升级命令如下:copy tftp://TFTP服务器IP地址/路径/文件名 system:image
Example:
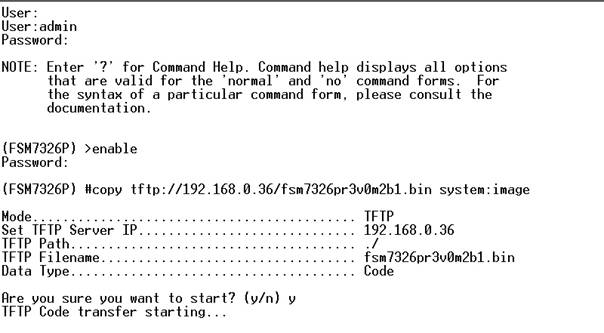
TFTP服务器上显示进度:
升级完成后终端显示:
查看当前版本,使用show hardware命令
(FSM7326P) #show hardware
System Description............................. FSM7326P
Burned In MAC Address.......................... 00:09:5B:D3:1F:89
Software Version............................... 3.0.2.1
最后,清空原有配置,使用clear config命令
(FSM7326P) #clear config
Are you sure you want to clear the configuration? (y/n)y
Configuration Cleared!
- 通过超级终端用XModem/YModem/ZModem升级
当交换机原有版本不损坏或丢失,不能管理的情况下,可以使用X/Y/ZModem上传代码,步骤如下:
首先,交换机启动的时候,出现启动菜单
U-Boot 0.3.0 (Nov4 2003 - 09:39:55)
CPU:MPC8245 Revision 1.4 at 266.666 MHz: 16 kB I-Cache 16 kB D-Cache
Board: Netgear FSM73xx
DRAM: 128 MB
FLASH: 16 MB
FSM7326 Startup Rev: 3.0
Select startup mode.If no selection is made within 5 seconds,
the FSM7326 Application will start automatically...
FSM7326 Startup -- Main Menu
1 - Start FSM7326 Application
2 - Display Utility Menu
Select (1, 2): 2
/*此时选择2进入高级菜单,1为启动交换机OS*/
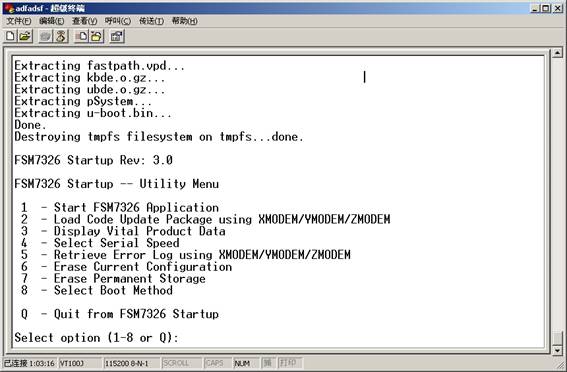
FSM7326 Startup Rev: 3.0
FSM7326 Startup -- Utility Menu
1- Start FSM7326 Application
2- Load Code Update Package using XMODEM/YMODEM/ZMODEM
3- Display Vital Product Data
4- Select Serial Speed
5- Retrieve Error Log using XMODEM/YMODEM/ZMODEM
6- Erase Current Configuration
7- Erase Permanent Storage
8- Select Boot Method
Q- Quit from FSM7326 Startup
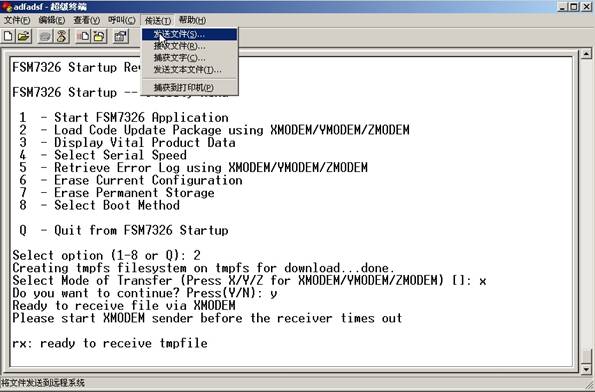
Select option (1-8 or Q):2
/*选择2从XModem更新软件代码*/
Creating tmpfs filesystem on tmpfs for download...done.
Select Mode of Transfer (Press X/Y/Z for XMODEM/YMODEM/ZMODEM) []:X
/*选择协议XModem*/
Do you want to continue? Press(Y/N): Y
/*确认继续*/
Ready to receive file via XMODEM
Please start XMODEM sender before the receiver times out
rx: ready to receive tmpfile
然后,从超级终端的菜单点击传送T>文件
选定要传送的文件,选择对应的协议XModem,点击传送
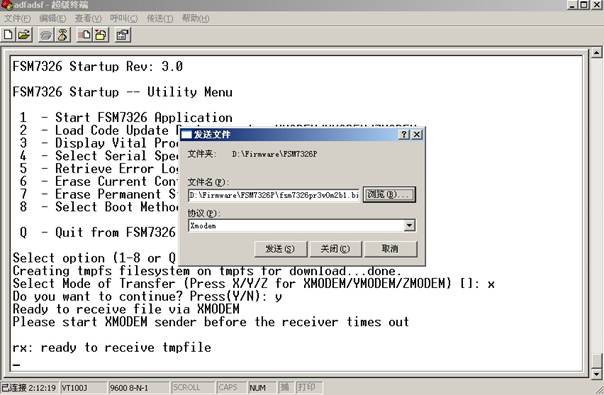
传送时状态:
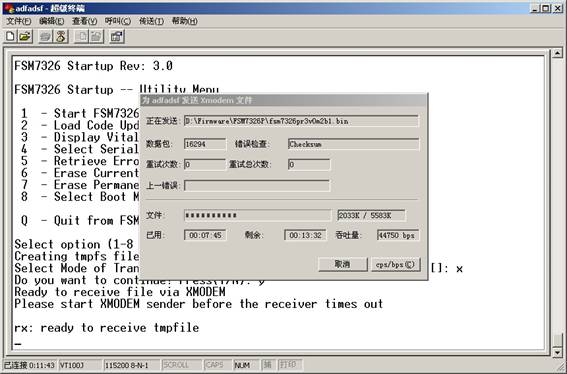
传送完成后显示:
最后,清空原有配置
FSM7326 Startup -- Utility Menu
1- Start FSM7326 Application
2- Load Code Update Package using XMODEM/YMODEM/ZMODEM
3- Display Vital Product Data
4- Select Serial Speed
5- Retrieve Error Log using XMODEM/YMODEM/ZMODEM
6- Erase Current Configuration
7- Erase Permanent Storage
8- Select Boot Method
Q- Quit from FSM7326 Startup
Select option (1-8 or Q):6
Erasing present configuration...done
|
序号 no. |
日期 date |
作者 author |
摘要 summary |
|
1 |
2010-10-21 |
NETGEAR |
文档创建 |